Uninstall 13z8jRK5z9PkVdim6nfmH4Qqqk6UAmycJr from Windows 2000
13z8jRK5z9PkVdim6nfmH4Qqqk6UAmycJr errors which should also be noticed 0x8024800D WU_E_DS_NOCATEGORIES The category was not added because it contains no parent categories and is not a top-level category itself., 0x0000004F, 0x000000FD, 0x80242013 WU_E_UH_BADCBSPACKAGEID The update metadata contains an invalid CBS package identifier., 0xf080C CBS_E_UNKNOWN_UPDATE named update not present in package, 0x00000057, 0x8024001B WU_E_SELFUPDATE_IN_PROGRESS The operation could not be performed because the Windows Update Agent is self-updating., 0x80243001 WU_E_INSTALLATION_RESULTS_UNKNOWN_VERSION The results of download and installation could not be read from the registry due to an unrecognized data format version., 0x8024200C WU_E_UH_FALLBACKTOSELFCONTAINED The update handler should download self-contained content rather than delta-compressed content for the update., 0x000000FE, 0x8024401D WU_E_PT_HTTP_STATUS_CONFLICT Same as HTTP status 409 - the request was not completed due to a conflict with the current state of the resource., 0x00000042, 0xf0822 CBS_E_ILLEGAL_COMPONENT_UPDATE Component update without specifyingEasy Guide To Do Away With 13z8jRK5z9PkVdim6nfmH4Qqqk6UAmycJr From OS
13z8jRK5z9PkVdim6nfmH4Qqqk6UAmycJr, a pernicious computer threat which damage the saved data and make other program unresponsive. Number of fake malicious process start running on the background which make consume more RAM memory and increase load on the CPU. This unwanted background process will create a havoc to the infected OS, which make the OS more sluggish then before. However 13z8jRK5z9PkVdim6nfmH4Qqqk6UAmycJr will not only make the infected OS slow, but after the infiltration the risk on privacy setting will be increased.
Hacker linked with this 13z8jRK5z9PkVdim6nfmH4Qqqk6UAmycJr threat will easily enter into the OS and collect all the private data. These private data is send to the third party, which will make benefit from it and even start demanding extortion money from the user. You will notice after the infiltration of this threat the OS will take more time to boot-up. Therefore you must learn the steps to Get Rid Of 13z8jRK5z9PkVdim6nfmH4Qqqk6UAmycJr from the OS.

Part 1 : Start Your OS In Safe Mode With Networking
Get Rid Of 13z8jRK5z9PkVdim6nfmH4Qqqk6UAmycJr For Window XP/Vista/7
- Click Start Menu >>> select the Restart option.
- Simultaneously press F8 button while the OS start booting.
- Here you will get Advance boot menu.
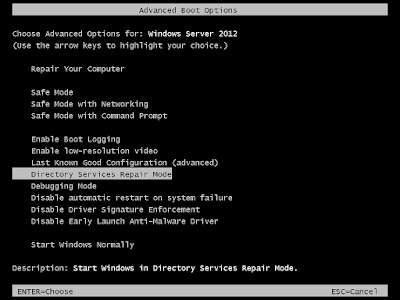
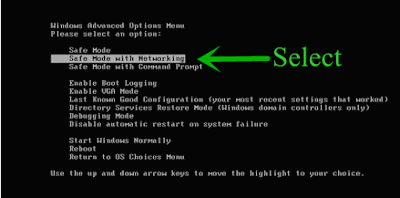
- In this Advance boot menu select Safe Mode With Networking Option.
- To open OS in Safe Mode With Networking press Enter button.
Get Rid Of 13z8jRK5z9PkVdim6nfmH4Qqqk6UAmycJr For Windows 8/10
- Click on Start Menu, hold Shift key and the press Restart button.

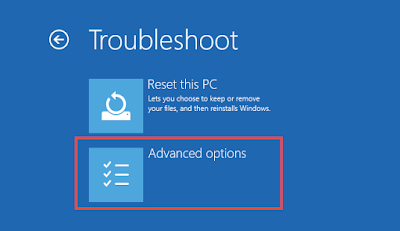
- In next Window select Troubleshoot option then click on Advanced Options.
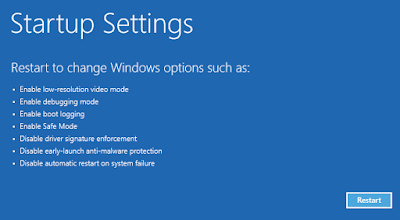
- Here select the Startup Settings option.
- Select Enable Safe Mode option then click on Restart button.
- Now Press F5 button for EnablingSafe Mode With Networking option.
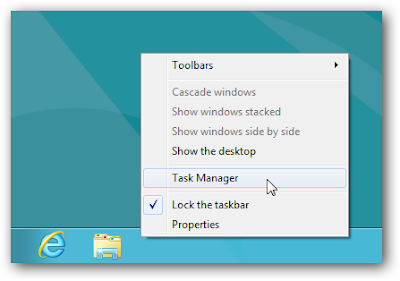
- Right Click on Task Bar and the select Task Manager.
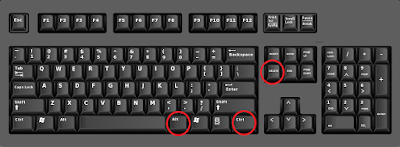
- You can also open Task by simultaneously press ALT+Ctrl+Del.
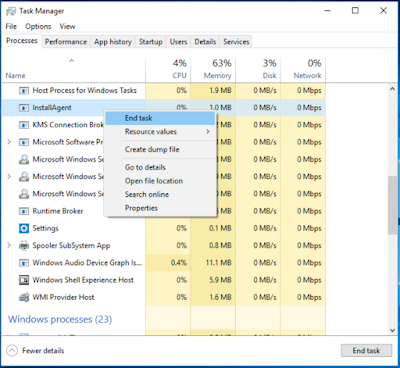
- Now Windows Task manager option will be open on screen.
- Find and select malicious process then click on End Task button.
Get Rid Of 13z8jRK5z9PkVdim6nfmH4Qqqk6UAmycJr From Windows XP
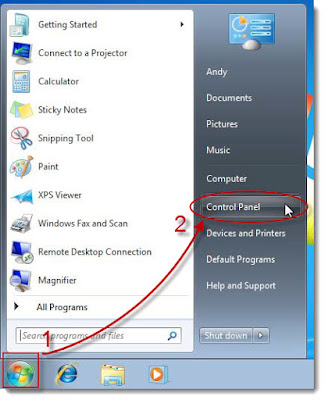
- Go the Start menu and select Control Panel.
- The select Add or Get Rid Of programs option.
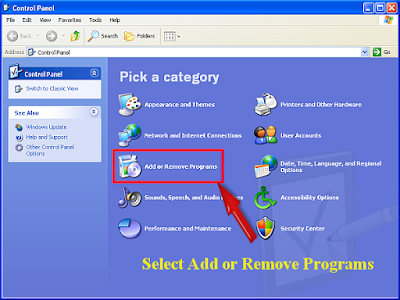
- In this Windows find 13z8jRK5z9PkVdim6nfmH4Qqqk6UAmycJr and Get Rid Of unwanted installed program from your OS.
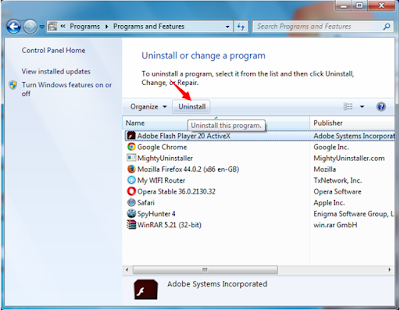
Get Rid Of 13z8jRK5z9PkVdim6nfmH4Qqqk6UAmycJr From Windows 7
- Press the Windows key to open All program list.
- Here select Control Panel Option.
- In Control Panel Windows select Programs menu and then click Get Rid Of a programs.
- Them select the 13z8jRK5z9PkVdim6nfmH4Qqqk6UAmycJr and click on Get Rid Of option.
Get Rid Of 13z8jRK5z9PkVdim6nfmH4Qqqk6UAmycJr From Windows 8
- Together Press Win+R button to open Run Box.
- In Run Box type control panel and hit Enter button.
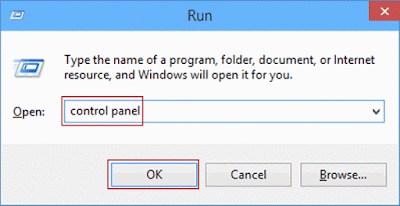
- On Control Panel and then Click Get Rid Of a program.
- Find unwanted programs and click on Get Rid Of option.
Get Rid Of 13z8jRK5z9PkVdim6nfmH4Qqqk6UAmycJr From Windows 10
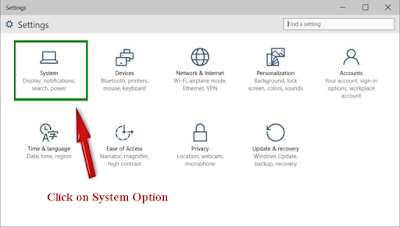
- Press Start Menu and select Settings option.
- Now choose OS option here.
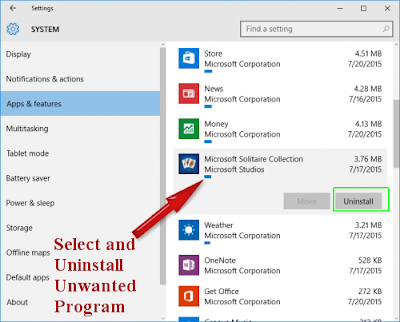
- Select on the Apps and Features option.
- On the is Windows Find 13z8jRK5z9PkVdim6nfmH4Qqqk6UAmycJr and click on Get Rid Of option.
Get Rid Of 13z8jRK5z9PkVdim6nfmH4Qqqk6UAmycJr From Google Chrome
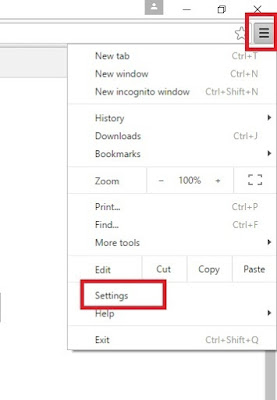
- Open Google Chrome browser then click on icon to top right corner to open Chrome menu.
- Now click on the Tools option.
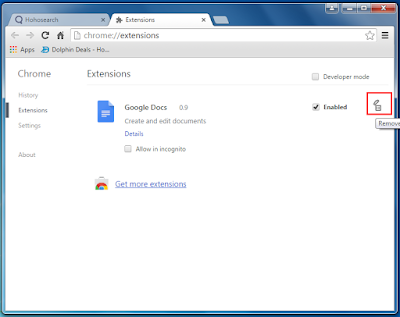
- Go to Extension and select all unwanted extension.
- Click on trash icon to Get Rid Of 13z8jRK5z9PkVdim6nfmH4Qqqk6UAmycJr from Google Chrome.
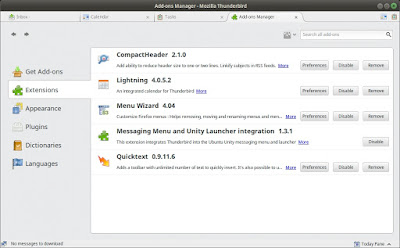
Get Rid Of 13z8jRK5z9PkVdim6nfmH4Qqqk6UAmycJr From Mozilla Firefox
- Click on Setting icon on top right corner to open browser menu.
- Now select Add-ons >> On Add-ons Manager tab select Extensions or Appearance panel.
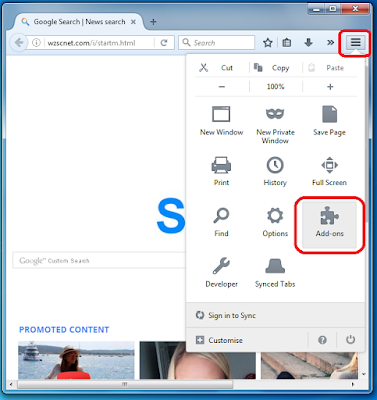
- Select 13z8jRK5z9PkVdim6nfmH4Qqqk6UAmycJr to Get Rid Of it.
- Click on the Get Rid Of button or Trash option.
Get Rid Of 13z8jRK5z9PkVdim6nfmH4Qqqk6UAmycJr From Internet Explorer
- Press Alt+T buttons on Internet Explorer to open Tool Option.
- Also to open Tools option click on Gear Icon from the right-top corner.
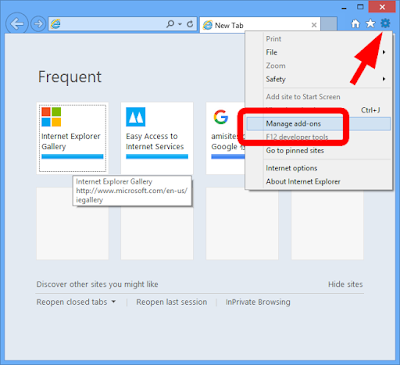
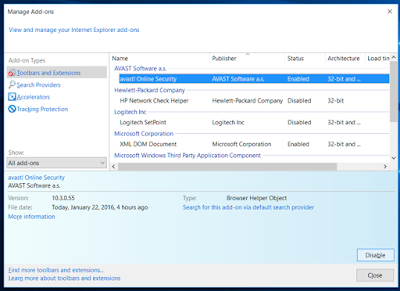
- Click on Manage Add-ons option then select Toolbars and Extensions tab.
- Find 13z8jRK5z9PkVdim6nfmH4Qqqk6UAmycJr and related add-ons then Click Disable.
- Finally click on Get Rid Of button.
Get Rid Of 13z8jRK5z9PkVdim6nfmH4Qqqk6UAmycJr From Microsoft Edge
- Open Microsoft Edge then click on More (...) icon.
- Now click on A specific page or pages option.
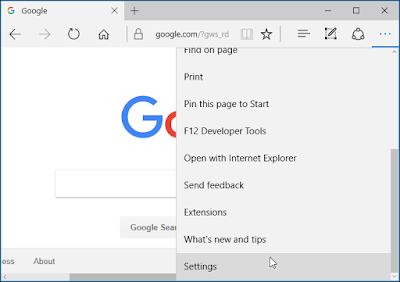
- Select Custom option >>> type the URL of the page.
- Now to fix it Restart your Microsoft Edge Browser.
Reset Microsoft Edge
- Click on More (...) icon, then select Settings option.
- Under Settings section click on Clear Browsing Data.

- Here click on Choose what to clear >> then click Show more.
- Select all and click Clear.
Reset Internet Explorer
- Click on Tools menu and select Internet Option.
- Click on Advance tab then click on Reset button.
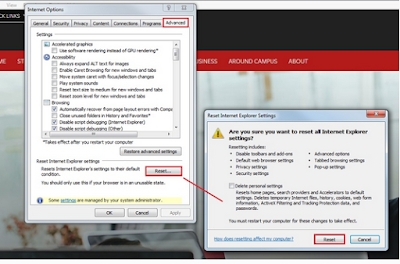
- Find Get Rid Of Personal Settings and then press Reset Button.
- Finally click on Close Button and Restart your IE.
Reset Google Chrome
- Click on Chrome menu to open the Settings.
- Now on Drop down option click on Settings option.
- Type Reset on the Search Box of Chrome Settings.
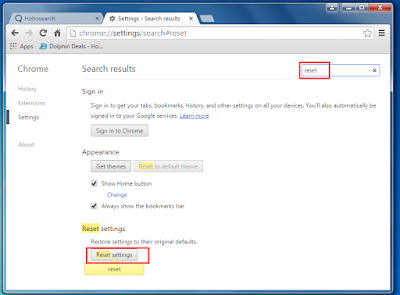
- Then click the Reset button until the Task is not completed.
- Then Restart the Browser.
Reset Mozilla Firefox
- Click on Firefox menu and click Help option.
- Here select Troubleshooting Information option.

- Press Refresh Firefox button from top of page.
- Click Refresh Firefox button and then Restart your Mozilla Firefox.
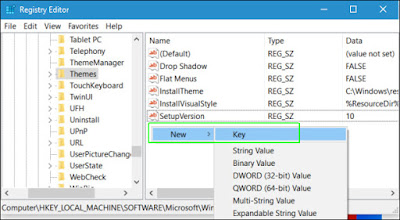
- Open Run Command >>> Press Win + R keys together.
- On Run Command Type regedit and hit Enter or Press OK.

- Find and Get Rid Of all related registry files of 13z8jRK5z9PkVdim6nfmH4Qqqk6UAmycJr.
- HKEY_LOCAL_MACHINEOSCurrentControlSetServicesWpm
- HKEY_CURRENT_USERSoftwareMicrosoftInternet ExplorerMain Default_Page_URL
- HKEY_LOCAL_Machine\Software\Classes\Chrome
- HKEY_CURRENT_USER\Software\Microsoft\Windows\CurrentVersion\Run .exe
- HKCU\Software\Microsoft\Windows\CurrentVersion\Internet Settings\random
- HKEY_LOCAL_MACHINE\SOFTWARE\Microsoft\Windows\CurrentVersion\run\random
- HKEY_CURRENT_USER\Software\Microsoft\Windows\CurrentVersion\Internet Settings CertificateRevocation

No comments:
Post a Comment